In this article
Items
Use this page to set up inventory, service, or non-inventory items. Items are part of standard Microsoft Dynamics 365 Business Central. For more information, see the Microsoft Dynamics 365 Business Central documentation.
Only inventory type items can be used with HMM. All other types of items–service or non-inventory items–are part of the standard Business Central product.
Set Up Items
To create an HMM item, do the following:
- Review the information here: Register New Items
 .
. - Under the Item FastTab, under Usage, select the type of usage of the item.
- Stock
- Non-Stock
- You can also make the items chargeable to specific patients by turning on Chargeable and then selecting a charge code and price to use for the item.
Set up Posting Group for Items
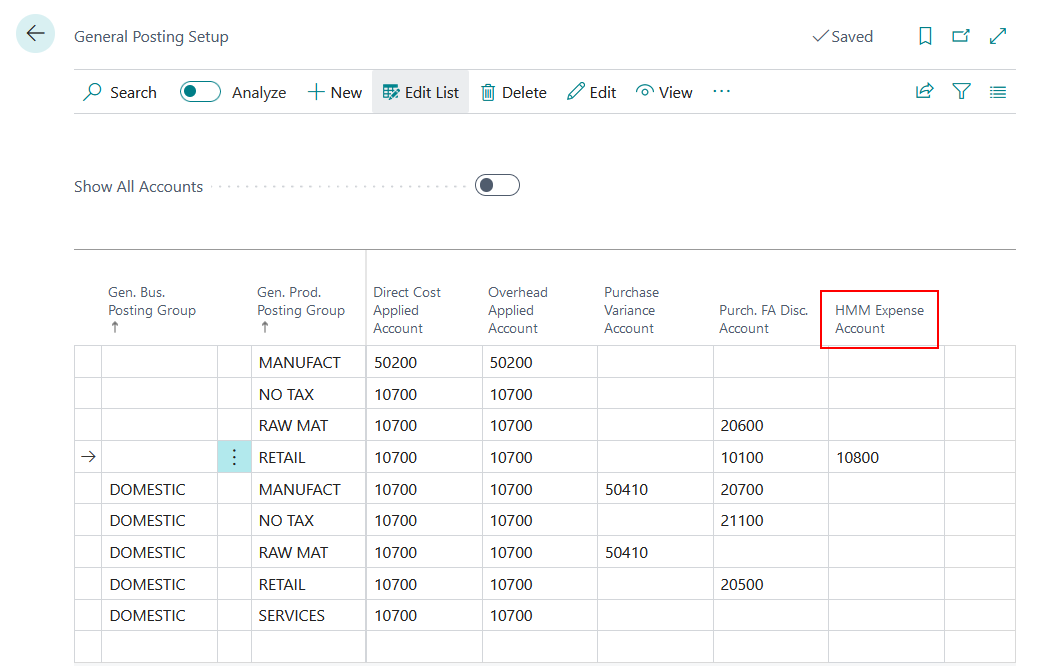
For items which will be used or expensed at non stock locations, you can assign a posting group which has an HMM expense account linked to it. The linked expense account will be used when you transfer items to non stock locations where transferred inventory is expensed immediately.
To set up a posting group for an HMM item, do the following:
- Search for and open the General Posting Setup page.
- Go to the Gen. Prod. Posting Group you want to assign an expense account to.
- Under HMM Expense Account, select an account to use. Refer to the image below to see the HMM Expense Account field.
- Then, search for and open the Items list page.
- Open an Item Card page by creating a new item or editing an existing one.
- If creating a new one, set up an item with all the necessary details as described in the Set up Items steps.
- On the Item Card page, under the Cost & Posting FastTab, go to Posting Details.
- For Gen. Prod. Posting Group, select the posting group which has an HMM Expense Account.
When this item is transferred to a non stock or expense location then the account you have linked with the Gen. Prod. Posting Group will be used.
Item Card Fields
The following field boxes are available:
| Field | Description |
| Usage |
Select whether the item is generally treated as Stock or Non-Stock. This value serves as the base input for deciding the default Usage when creating Stockkeeping Units (SKUs). The Item Card Usage does not control inventory behavior directly at the item level. Instead, it guides the system to default value in Usage field of Stockkeeping Unit based on the Location Type on the Location card page during the creation of Stockkeeping Unit:
|
| Par Quantity |
Displays the total par quantity for the item for all locations where the item is included in a par list. For example, if the item, Gloves, is included on the par lists for both Location A and Location B, then the par quantity displayed on the Gloves item card will be the sum of both par quantities from the par lists of Location A and Location B. |
| Chargeable |
Turn on to make the item chargeable to patients.
|
| Charge Code | If you have turned on Chargeable for the item, then select the charge code for the item. The charge code must be unique unless you have turned on Allow Duplicate Charge Code in your HMM Setup. |
| Price | If you have turned on Chargeable for the item, then enter the price of the item. This price will be charged to patients who purchase the item. |
| Manufacturer Code |
Select the manufacturer of the item. The manufacturer you select will be displayed in various pages, whenever the selected item is used. |
| Manufacturer Item No. |
Enter a description or name for the item, based on how the manufacturer refers to the item. For example, if the item description is 01-Bandages, and the manufacturer has named the item as 10001-Gauze. Enter 10001-Gauze as the manufacturer item number. |
| Gen. Prod. Posting Group |
Select the item's product type to link transactions made for this item with the appropriate general ledger account according to the general posting setup. For HMM items, select the posting group which has an HMM account linked to it. This account will be used as a replacement for the Inventory Adjustment account when an item is transferred to a non stock or expense location where transferred inventory is expensed immediately when transferred. |
| Dimension Value for Chargeable Item |
Specifies the default dimension value assigned to chargeable items (Non-Stock). This value overrides the default dimension value defined in HMM Setup for the selected default dimension code and is used during inventory transactions for chargeable items. |
Items List
The Items list page is a standard part of Business Central. On this page you can view a list of your items. With HMM, you can print the bar code labels of inventory items
Print Barcode Labels of Items
To print the barcode labels of items, do the following:
- Search for and open the Items list page.
- On the Action tab, select Actions > HMM > Piggyback Label. The HMM Piggyback Label dialog opens.
- Under Item No., select the items to print their barcode labels. You can select multiple items.
- Under Number of Copies, select the number of labels you want to print.
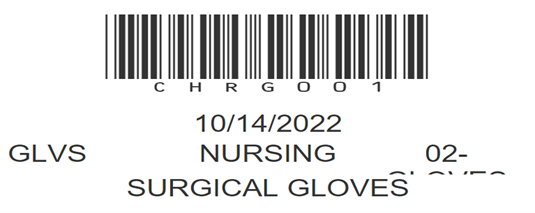
- Select Print to print the barcode labels. In the image below, the Piggyback Label displays the following information.
- Item Number: 02-GLOVES
- Item Description: Surgical Gloves
- Location Code: Nursing
- Charge Code: CHRG001
- Vendor Item Number: GLVS
Items (List) Fields
The following field boxes are available:
| Field | Description |
| Manufacturer Code |
Displays the manufacturer of the item, if applicable. |
| Manufacturer Item No. |
Displays the manufacturer name of the item. |
Items (List) Actions
The following actions are available:
| Action | Description |
|
Piggyback Label Actions > HMM > Piggyback Label |
Print the barcode label of the selected item or items. The barcode label displays the item number, item description, location code, charge code, and the vendor item number. |
Item Vendor Catalog
To open the Item Vendor Catalog of an item, go to your Item page > Select More options on the Action tab > Select Related > Purchases > Vendors.
When you open the Item Vendor Catalog of an item, you can also enter the unit of measure (UoM). The unit of measure that you enter on the Item Vendor Catalog is used for your purchase requisitions and orders for this item.
The following field boxes are available:
| Action | Description |
| Purchase UoM | Enter the unit of measure (UoM) for the item. The unit of measure that you select will be used when processing a purchase requisition or order using the par count or auto replenishment process for the item and vendor. |