In this article
Configuration Packages: Billing Schedule Header
Review the following information for creating billing schedules (header only) by exporting and then importing configuration packages for the billing schedule header (BssiArcbBillingScheduleHdr) table, use table ID 23065674.
Create a Billing Schedule
To create one or more billing schedules, you must export and then import the billing schedule header data. For detailed steps for configuration packages, follow the instructions in the Prepare a Configuration Package ![]() article in the Microsoft Dynamics 365 Business Central documentation and incorporate these steps:
article in the Microsoft Dynamics 365 Business Central documentation and incorporate these steps:
- Create a configuration package
 :
: - Ensure that you specify the Code, Package Name, and Language ID.
- In the Tables FastTab, select the billing schedule header (BssiArcbBillingScheduleHdr) table (table ID: 23065674).
- Export the configuration package for the table to Microsoft Excel (Package > Export to Excel). The file is saved to your default downloads folder.
- Open the exported configuration package in Excel.
- Delete all data except for the header row.
 Important: When you delete the other lines, do not delete the header information or modify the format of the file.
 - For each billing schedule you want to create, specify the Start Date and Sell-to Customer No., and exclude the End Date from the configuration file.
To exclude a field, see the next section Create Billing Schedule and Exclude Fields. Note: Because empty fields are imported as blank data in the billing schedule, the best practice for the configuration package is to exclude fields that do not have data and to only include fields that have data.
 - Save the file.
- Import the updated file (Package > Import from Excel).
- On the import preview, select Import.
- Back on the configuration package window, validate the package (Process > Validate Package ) and then apply the data (Process > Apply Data).
- When you see the confirmation message, select OK.
![]() Note: During the data import, the group name is never imported from the configuration package. The group as set up on the SBS ARCB Billing Schedule Setup page is always used. Also, any empty values imported are updated to use the default values from the default billing schedule group. Since the End Date is excluded, it is automatically updated when the data is imported based on the start date, frequency, and number of periods.
Note: During the data import, the group name is never imported from the configuration package. The group as set up on the SBS ARCB Billing Schedule Setup page is always used. Also, any empty values imported are updated to use the default values from the default billing schedule group. Since the End Date is excluded, it is automatically updated when the data is imported based on the start date, frequency, and number of periods.
| Column Name | Data Type | Required | Description |
|---|---|---|---|
|
|
|||
| Start Date | Date | Required | |
| End Date | Date | When left empty, the end date is automatically calculated based on the start date and number of periods specified. | |
| Frequency | |||
| Interval | |||
| Termination Date | |||
|
|
|||
| Status | |||
| Auto-Renewed | |||
| Description | |||
| Notice Given Days | |||
| Renew X days in Advance | |||
| Currency Code | |||
| Location Code | |||
| Salesperson Code | |||
| Responsibility Center | |||
| Payment Terms Code | |||
| Bill-to Customer No. | |||
| Bill-To Name | |||
| Bill-to Address | |||
| Bill-to Address2 | |||
| Bill-to City | |||
| Ship-to Code | |||
| Ship-to Name | |||
| Ship-to Address | |||
| Ship-to Address2 | |||
| Ship-to City | |||
| Billing Schedule Revenue Total | |||
| Bill-To Postal Code | |||
| Bill-To Country | |||
| Ship-to Postal Code | |||
| Ship-to Country | |||
| Sell-to Address | |||
| Sell-to Address 2 | |||
| Sell-to City | |||
| Sell-to Contact | |||
| Sell-to Postal Code | |||
| Sell-to County | |||
| Align To Month | |||
| ProRate Partial Period | |||
| Shipment Method Code | |||
| Package Tracking No. | |||
| Shipping Agent Service Code | |||
| Shipping Agent Code | |||
| Ship-to County | |||
| Ship-to Post Code | |||
| Ship-to Country/Region | |||
| Ship-to Contact | |||
| Sell-to Contact No. | |||
| Sell-to Country/Region | |||
| Sell-to Customer Name 2 | |||
| Sell-to Customer No. | Required | ||
| Your Reference | |||
| External Document No. | |||
| Bill-to Contact | |||
| Bill-to Contact No. | |||
| Bill-to Country/Region | |||
| Invoice Separately | |||
| Tax Liable | |||
| Tax Area Code | |||
| Billing Schedule Total | |||
| Detail Outstanding Amount | |||
| Detail Total Amount | |||
| Group | |||
| No.Series | |||
| End User | |||
| Annualized Invoiced Amount | |||
| Number of Periods | |||
| Calculation Method | |||
| Day of Invoice Date | |||
| Renewal Lines | |||
| Milestone No | |||
| Shortcut Dimension 1 Code | When Multi-Entity Management is installed, this value is required. | ||
| Shortcut Dimension 2 Code | |||
| Termination Date2 | |||
| Next Invoice Date | |||
| Next Invoice Amount | |||
| Direct Debit | |||
| Mandate ID | |||
| Payment Method Code | |||
| User Defined Field 1 | |||
| User Defined Field 2 | |||
| User Defined Field 3 | |||
| User Defined Field 4 | |||
| User Defined Field 5 | |||
| User Defined Field 6 | |||
| User Defined Field 7 | |||
| User Defined Field 8 | |||
| Order No. | |||
| User Defined Field 9 | |||
| User Defined Field 10 | |||
| User Defined Field 11 | |||
| User Defined Field 12 | |||
| User Defined Field 13 | |||
| Alignment Date | |||
|
Dimension Set ID |
Create Billing Schedule and Exclude Fields
To ensure that the configuration package includes only the fields you want to import, you can exclude fields. Use the Config. Package Fields dialog to clear the Include Field check box to exclude the fields you do not want in the configuration package. Based on the Subscription Billing setup, some fields are automatically updated when they are excluded from the configuration package:
- If the billing schedule number (BssiArcbBillingScheduleNumber) is excluded, it is automatically generated based on the billing schedule group selected.
- If the end date is excluded, it is updated based on the start date and number of periods specified.
- If certain fields are excluded, they are updated based on information from a master record.
For example, a customer record has the following fields: Bill-to-related fields (such as name, address), Ship-to-related fields(such as name, address). When these fields are not in the configuration package, they are updated from the customer record during the import.
To create a billing schedule and exclude certain fields during the import, you can create a configuration package using the instructions from the previous section, Create a Billing Schedule , and incorporate these steps. For this exercise, the Bill-to and Ship-to fields are to be excluded.
- Create a configuration package for the billing schedule header (BssiArcbBillingScheduleHdr) table, use 23065674.
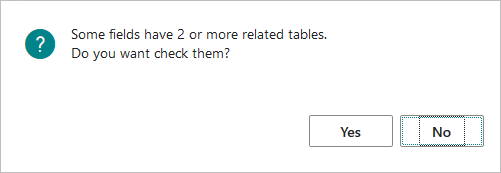
- Select Yes to the following prompt:
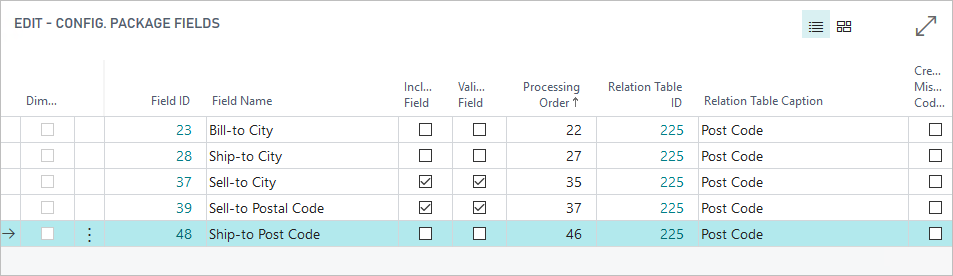
- On the Edit - Config. Package Fields dialog, clear the Include Field check box for any field you do not want to export to the configuration package. For this exercise, clear the check box for all Bill-to and Ship-to fields.
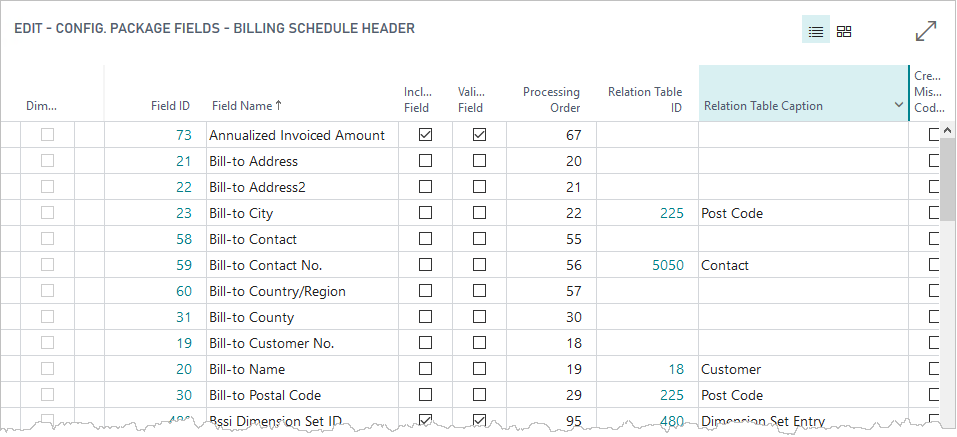
- To exclude additional fields, on the Tables FastTab, select Table > Fields to open the Edit - Config. Package Fields dialog.
- On the Config. Package Fields dialog, clear the Include Field check box for these additional fields:
- All Bill-to and Ship-to fields that were not available in the previous step.
- End Date, No. Series, Tax area code, Tax liable, Pro-rate, and Align to Month.
- Export the configuration package for the table to Microsoft Excel (Package > Export to Excel). The file is saved to your default downloads folder.
- Open and edit the file in Excel.
- Follow the steps in Create a Billing Schedule for importing and then validating and applying the configuration package.
Update Fields in a Billing Schedule
To update fields in a billing schedule, you can create a configuration package using the instructions from the previous section, Create a Billing Schedule , and incorporate these steps.
- Create a configuration package for the billing schedule header (BssiArcbBillingScheduleHdr) table, use 23065674.
- Exclude any fields you do not want to include in the configuration file.
- Export the configuration package for the table to Microsoft Excel (Package > Export to Excel). The file is saved to your default downloads folder.
- Open and edit the file in Excel.
- Delete all rows that you do not need, and edit the values of any remaining rows.
- Follow the steps in Create a Billing Schedule for importing and then validating and applying the configuration package.
When updating the billing schedule, any fields that were automatically calculated are updated with new values based on either manually entered values or are recalculated based on other import fields (for example, end date).
Create a Billing Schedule from Excel
To create one or more billing schedules with information from the configuration package, use the instructions from the previous section, Create a Billing Schedule , and incorporate these steps.
- Create a configuration package for the billing schedule header (BssiArcbBillingScheduleHdr) table, use 23065674.
- On the Tables FastTab, select Table > Fields to open the Edit - Config. Package Fields dialog.
- Move Sell-to Customer No. to the position before Bill-to Customer No.
To update the End Date with the value from the specified value from the configuration package, ensure that you move the Number of Periods field to be between the Start Date and End Date fields. - Exclude any fields that you do not want to include in the configuration package.
- Export the configuration package for the table to Microsoft Excel (Package > Export to Excel). The file is saved to your default downloads folder.
- Open and edit the file in Excel.
- Delete any existing data except for the header.
- For each billing schedule you want to add, specify all fields values.
Ensure that Sell-to and Bill-to fields have values. If these fields do not have values, they are updated based on the master record.
- Follow the steps in Create a Billing Schedule for importing and then validating and applying the configuration package.
Rolldown Functionality
The following table provides information on fields that have the rolldown functionality and how the data import from the billing schedule header affects the billing schedule lines:
| Field Name | Confirmation Message | Yes | No |
|---|---|---|---|
|
Start Date
|
Message 1: Do you want to roll down start date? | Updates the header start date and rolls it down to all billing schedule line(s). | Updates the start date in the billing schedule header only, not the billing schedule line(s). |
| Message 2: Do you want to roll down end date? | Updates the header end date and rolls it down to all billing schedule line(s). | Updates the end date in the billing schedule header only, not the billing schedule line(s). | |
|
End Date |
Do you want to roll down end date? | Updates the header end date and rolls it down to all billing schedule line(s). | Updates the end date in the billing schedule header only, not the billing schedule line(s). |
|
Frequency |
Message 1: Do you want to roll down frequency? | Updates the frequency in billing schedule header and billing schedule line(s). | Updates the frequency in the billing schedule header only, not the billing schedule line(s). |
|
|
Message 2: Do you want to roll down end date? | Updates the end date according to the start date, frequency and number of periods. | Updates the end date in the billing schedule header only, not the billing schedule line(s). |
|
Interval |
Do you want to roll down Interval? | Updates the interval in billing schedule header and billing schedule line(s). | Updates the interval in the billing schedule header only, not the billing schedule line(s). |
|
Renewal Lines |
Do you want to roll down lines to add per renewal? | Applies the rolldown functionality to the billing schedule line(s). | Does not apply the rolldown functionality to the billing schedule line(s). |
|
Alignment Date |
Are you sure you want to roll down the Alignment Date? | Updates the alignment date in billing schedule header and billing schedule line(s). | Updates the alignment date in the billing schedule header only, not the billing schedule line(s). |
Update Bill-to Address
To change the Bill-to address, review the following information:
- Use the default Bill-to address for a customer
Before creating the configuration package, exclude the following Bill-to fields from the export.
- Bill to option
- Bill to customer no.
- Bill to customer name
- Bill to address
- Bill to address 2
- Bill to city
- Bill to contact
- Bill to contact no.
- Bill to postal code
- Bill to county/region
When the configuration package is imported, the Bill-to fields are automatically updated based on the values of the Sell-to Customer.
- Use the Bill-to address of a different customer
(Bill-to: Another customer)
When editing the configuration package, ensure to specify the following:
- Bill-to Customer No.
- Bill-to Name
- Bill-to Address
- Bill-to City
- Bill-to Postal Code
- Bill-to Country/Region
- Bill-to Contact
- Use a Bill-to address
that is not in Subscription Billing (Bill-to: Custom address)
When editing the configuration package, ensure to specify the following:
- Bill-to Customer No. (must be the same as the Sell-to customer)
- Bill-to Name (must be the same as the Sell-to customer Name)
- Bill-to Address
- Bill-to City
- Bill-to Postal Code
- Bill-to Country/Region
- Bill-to Contact
Update Ship-to Address
To change the Ship-to address, review the following information:
- Use an alternate Ship-to
When editing the configuration package, ensure to specify the following:
- Ship-to Code
- Ship-to Name
- Ship-to Address
- Ship-to City
- Ship-to Postal Code
- Ship-to Country/Region
- Ship-to Contact
- Use a Ship-to address
that is not in Subscription Billing (Ship-to: Custom address)
When editing the configuration package, ensure to specify the following:
- Ship-to Code. (must be empty)
- Ship-to Name
- Ship-to Address
- Ship-to City
- Ship-to Postal Code
- Ship-to Country/Region
- Ship-to Contact
Multi-Entity Management Integration
To create one or more billing schedules when using the Multi-Entity Management integration, when you edit the configuration file, the Shortcut Dimension 1 Code field must contain a value.
- Create a configuration package for the billing schedule header (BssiArcbBillingScheduleHdr) table, use 23065674.
- Export the configuration package for the table to Microsoft Excel (Package > Export to Excel). The file is saved to your default downloads folder.
- Open and edit the file in Excel.
- Ensure that the Shortcut Dimension 1 Code is entered for all lines.
- Follow the steps in Create a Billing Schedule for importing and then validating and applying the configuration package.
![]() Tip: To add other dimensions before you export the configuration package, in the Tables FastTab, select the Dimension as a Column check box for the table.
Tip: To add other dimensions before you export the configuration package, in the Tables FastTab, select the Dimension as a Column check box for the table.
If you added the other dimensions, they appear as columns at the far right of the configuration package in Excel.