Document Setup
Screen location: Business Central Home → eMailer Manager → eMailer Manager Setup → Document Setup
This screen is used to configure the parameters and templates for sending emails, for each supported document type. This screen will use the Document Setup Scope setting (user or shared) defined in the Default Email Accounts screen.
Navigating to This Screen
-
From the Business Central home page, click on the eMailer Manager link in the main menu.
-
The eMailer Manager sub-menu will appear. Click on the eMailer Manager Setup link.

-
The eMail Manager Setup screen will appear. Click on the Document Setup link in the main menu.

-
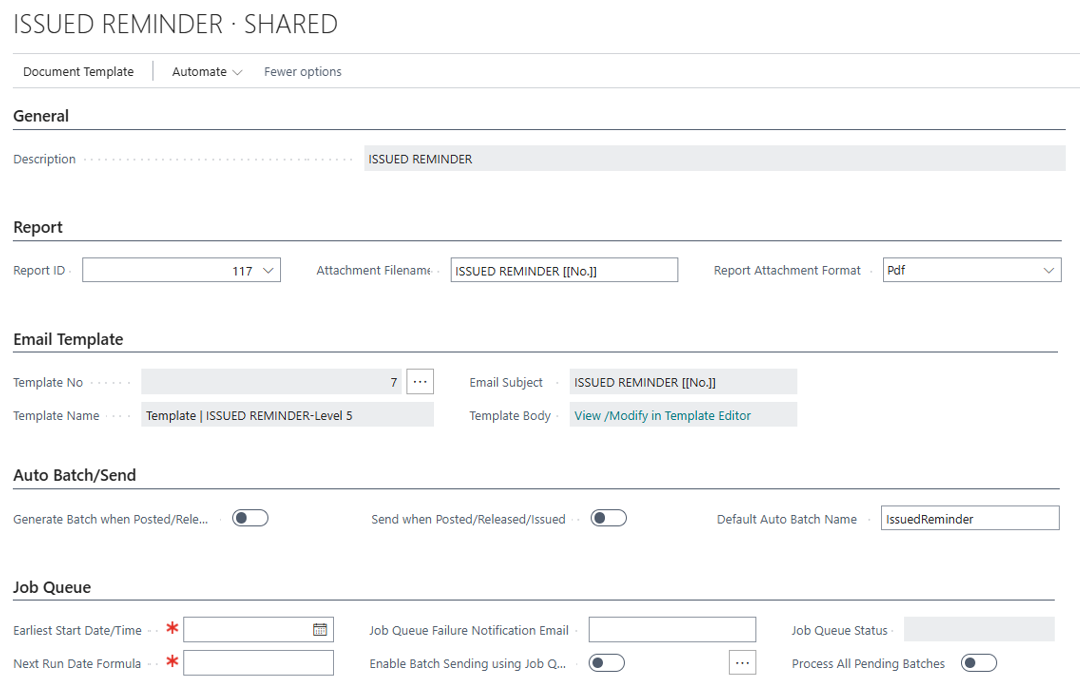
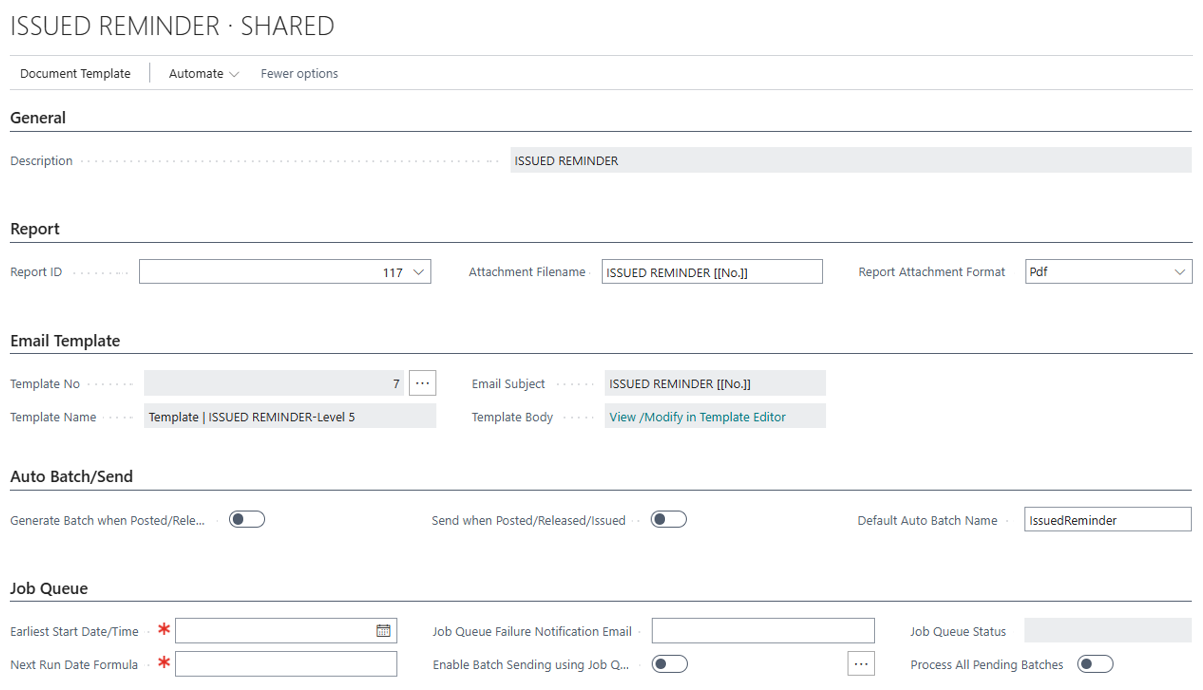
The Document Setup screen will be shown.

The Report ID field shows the ID of the report selected for the document to be used to generate the attachment for the document.
Additional Menu Options
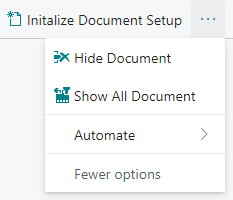
Click on the three horizontal dots to display the additional menu options.

Initialize Document Setup: Refreshes the list of documents. This is used to check for any missing documents.
Hide Document: Hides documents from any third-party applications. This is enabled for integrated documents only.
Show All Documents: Displays documents that were labelled as "hidden" by the user.
View a Document
-
Select a document by clicking once on its row. That row will be highlighted.
-
Click on the Manage link from the menu at the top of the screen. A document task bar will appear.
-
Click on the View icon from the taskbar. The following screen will be shown. From here you can view all of the document data.


Edit a Document
-
Select a document by clicking once on its row. That row will be highlighted.
-
Click on the Manage link from the menu at the top of the screen. A document task bar will appear.
-
Click on the Edit icon from the taskbar. The following screen will be shown. From here you can view and edit all of the document data.


Initialize Document Setup
This screen enables the user to initialize and display the supported document types used by eMailer Manager. When the user installs eMailer Manager for the first time, this screen will be displayed without any document types listed. Once the Initialize Document Setup menu item is clicked, then this action will populate the screen with a list of the supported document types. At this point, the document types can be configured individually. This is a one-time action, that is performed only after the initial installation of eMailer Manager.
Click on the Initialize Document Setup link at the top of the screen.
Author Notes: Vinay wants the Initialize Documents section removed, since the details have already been listed above. However, this menu item's functionality should still be documented.