In this article
Purchase Transactions
MEM functionality works with the following purchase transaction pages:
- Blanket Purchase Order
- Purchase Credit Memo
- Purchase Invoice
- Purchase Order
- Purchase Quote
- Purchase Return Order
Intercompany Distributions
When transactions are processed, the Due To and Due From accounts are selected as follows:
- If the destination account has a debit amount (positive amount):
| Originating Entity Due From account | Debit | ||
| Destination Entity Due To account | Credit |
- If the destination entity account has a credit amount (negative amount):
| Destination Entity Due From account | Debit | ||
| Originating Entity Due To account | Credit |
From the MEM Intercompany Setup page, the following intercompany setup is used:
| Originating Entity | 000 | ||
| Destination Entity | 100 | ||
| Originating | |||
| Due To | 111111 | ||
| Due From | 222222 | ||
| Destination | |||
| Due To | 333333 | ||
| Due From | 444444 |
When the destination entity has a debit (positive) amount, the intercompany distributions are as follows:
| Destination Entity | Account | Amount | |
| 100 | 123333 | 100 | |
| Following distributions are created: | |||
| 222222 | 100 (debit) | ||
| 333333 | 100 (credit) | ||
When the destination entity has a credit (negative) amount, the intercompany distributions are as follows:
| Destination Entity | Account | Amount | |
| 100 | 123333 | -100 | |
| Following distributions are created: | |||
| 444444 | 100 (debit) | ||
| 111111 | 100 (credit) | ||
Intercompany Transactions
Four types of intercompany transactions can be created with the following combinations of Intercompany Suite partners:
- Both originating and destination companies use the intercompany functionality with Multi-Entity Management.
- The originating company uses the intercompany functionality with Multi-Entity Management and the destination company uses the intercompany functionality only.
- The originating company uses the intercompany functionality only and the destination company uses the intercompany functionality with Multi-Entity Management.
- Both originating and destination companies use the intercompany functionality only.
IC Suite IC Trade Vendors
If the vendor is an IC Suite IC Trade vendor, the IC Partner entity defaults to the entity value that was set up on the IC Suite Customer/Vendor page and is non-editable. If the vendor is not an IC Suite Trade vendor, standard functionality is followed.
Once the transaction is posted and sent to the IC partner, a sales transaction is created in the Destination Company. The Customer is determined based on the following criteria:
-
ICS IC Trade Customer: The ICS IC Trade Customer has been set up for the originating company.
-
IC Partner Customer: The ICS IC Trade Customer has not been set up for the originating company.
Transaction Lists
When viewing a list of transactions, only the transactions that belong to an entity to which you have access appear in the list. The list has the Entity Code column that shows the entity to which the transaction belongs.
You can view and edit any transaction as you usually would in Microsoft Dynamics 365 Business Central.
Create Purchase Transaction
To create a purchase transaction, follow the steps within the Microsoft Dynamics 365 Business Central documentation, and incorporate these steps:
- In the Select an Entity dialog, select the entity code you want to use and select OK. Your default entity is automatically used, but you can change it as needed.
- In the header, select the Allocation Template. Selecting the allocation template is optional.
- You can add or edit each transaction line as follows:
- If needed, change the Entity Code.
- If needed, specify or change the MEM Allocation Template.
- If you want to change the allocation amounts for the line, select Line > MEM Allocation Template.
- On the Edit - Allocation page, edit the allocation dimensions and edit the Allocation Details as needed, and select Close.
- Select Posting > Preview Posting to review the ledger entries for the transaction.
- You can then finish processing the transaction by following the instructions in the Microsoft Dynamics 365 Business Central documentation.
The entity and allocation template become the default values for the transaction lines.
Creating Purchase Transactions from Incoming Documents
Use this section to create a purchase transaction from an incoming document. With Multi-Entity Management, you can assign an incoming document to any of your entities.
For information about how to process incoming documents, see Incoming Documents![]() in the Microsoft Dynamics 365 Business Central documentation.
in the Microsoft Dynamics 365 Business Central documentation.
To assign an entity to an incoming document, do the following:
-
Go to the Incoming Documents list page.
-
On the action tab, select New.
-
Select the entity you want to use.
-
Select OK.
In the new Incoming Document card, the entity you select appears in the Entity Code field.
Create Incoming Documents Manually
If you choose to process an incoming document manually, then the entity code is visible in whichever type of document you select. For example, if you create a General Journal line, then the entity code is visible on the header and as a column in the Lines FastTab.
To create an incoming document manually, do the following:
-
Create a new incoming document record.
-
Then, on the Action tab of the Incoming Document card, select Create Manually.
-
Select the type of document you want to create. Select OK.
-
Depending on the type of document you select, that document card opens. For example, if you create a General Journal line, then the General Journals card opens.
When you select the entity for your incoming document, that same entity is used in the new document you create manually.
Use OCR Service with Incoming Documents
You can use an OCR service (Optical Character Recognition) to process incoming documents and convert them into Microsoft Dynamics 365 Business Central records. For more information on using an OCR service, see Use OCR to Turn PDF and Image Files into Electronic Documents![]() in the Microsoft Dynamics 365 Business Central documentation.
in the Microsoft Dynamics 365 Business Central documentation.
To assign an entity through an OCR service, do the following:
-
Add the entity to your external documents.
-
Make sure to train your OCR service to read the entity from the external document.
-
Add the mapping for the entity in the Data Exchange Definition
 card.
card.
Map the entity to either the Shortcut Dimension 1 Code or the Shortcut Dimension 2 Code in the Data Exchange Definition card, depending on which global dimension you are using for your MEM entity.
![]() Note: If an entity is mapped in the Data Exchange Definition card, and the entity of an incoming document is different from the entity of the OCR service, MEM will ask which entity you want to use for the incoming document. You can choose between the entity of the incoming document or the entity that is mapped in your OCR service.
Note: If an entity is mapped in the Data Exchange Definition card, and the entity of an incoming document is different from the entity of the OCR service, MEM will ask which entity you want to use for the incoming document. You can choose between the entity of the incoming document or the entity that is mapped in your OCR service.
Allocation with Deferrals
The Allocation with Deferrals customization allow users to distribute a transaction amount across multiple entities, with the option to defer and recognize the amount over time.
Posted Entries Allocation:
-
Deferral Entry: Allocate amounts to the Deferral account specified in the deferral template.
-
Recognition Entries: Allocate amounts to both the Deferral account and Recognition account.
-
Non-Deferred amount: Allocate the non-deferred portion to the Expense account.
-
Discounts: Allocate discount amounts accordingly.
Add MEM intercompany Due To/Due From for (Originating Entity is Header Entity):
-
Allocated amount of Deferral account for deferral entry
-
Allocated non-deferral amount
-
Allocated discount amount
Fields
The following field boxes are available:
| Field | Description |
| Entity Code |
Select the entity for the transaction. The default value is your default entity. If needed, you can select any entity to which you have access. When this entity is assigned to the transaction, you can access only the transactions to which you have entity access. |
| Vendor Name |
Select the vendor for the transaction. When Vendor Security is selected on the Multi-Entity Management Setup page and entity relationships with vendor records are set up on the MEM Master Security page, only the vendors that belong to entities to which you have access can be selected. When Vendor Security is not selected, you can select any vendor. |
| Allocation Template |
Select the entity allocation template for the transaction. This template is the default value for all new entries in the lines area. When you change the entity allocation template, you have the option of rolling down the changes to the other lines. For more information on the entity allocation template, see MEM Entity Allocation. |
| IC Doc Number |
Displays the sales order number from which the purchase order originated. This field appears for purchase orders that were created from intercompany trade transactions. |
| IC Trade Allocation | Mark if the purchase transaction is IC trade allocation. The default value is specified in the Multi-Entity Management Setup. This field appears for purchase order, purchase invoice and posted purchase invoice. |
| Intercompany Suite | |
| IC Partner Entity |
Select the IC Partner's entity. Only available for Purchase Order and Purchase Return Order. |
| Lines | |
| Allocation Template |
Displays the entity allocation template that is selected in the header. If needed, you can change the template. To change the allocation values for a line, select Line > MEM Allocation Template. |
| Entity Code |
Displays the entity for the line. The default value is specified in the header. If needed, you can change the entity to any entity to which you have access. |
| Location Code |
Select the location code. When Location Security is selected on the Multi-Entity Management Setup page and entity relationships with location records are set up on the MEM Master Security page, only the location codes that belong to entities to which you have access can be selected. When Location Security is not selected, you can select any location code. |
| No. |
Select the item number. When Item Security is selected on the Multi-Entity Management Setup page and entity relationships with item records are set up on the MEM Master Security page, only the item numbers that belong to entities to which you have access can be selected. When Location Security is not selected, you can select any item number. |
| Intercompany Suite | |
| IC Partner Entity |
Select the IC Partner's entity. Not available for Purchase Quote or Blanket Purchase Order. |
| ICS Partner Code |
Select the IC Suite Partner. Not available for Purchase Quote or Blanket Purchase Order. |
| Invoice | |
| Company Bank Account Code |
For Purchase Orders and Purchase Invoices, select the bank account code for the transaction. The bank account code assigned to the vendor and purchase order or invoice entity is the default Company Bank Account Code. If you have not selected a bank account code, a bank account is used according to the following priority:
|
Actions
The following actions are available:
| Action | Description |
| Header | |
| Prepare > Incoming Document |
Attach an incoming document to the purchase transaction, purchase or sales invoice, credit memo, or journal line. Select Create from File or Select.
|
| IC Suite Dimensions | This will navigate users to IC Suite Dimensions window where users will select non-entity dimensions from the destination company for the intercompany suite transaction. When users click on this action, they will be redirected to "IC Suite Dimensions- Edit Dimension Set Entries" window. |
| Lines | |
| Line > MEM Allocation Template |
Shows the details of the entity allocation for the transaction line. You can change the entity allocation for the transaction line as needed. Any changes made are in real-time for the transaction line and do not affect the template. You can make any of the following changes:
|
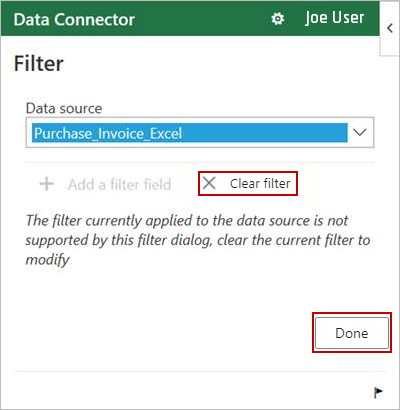
| Page > Edit in Excel |
This action is available for the following purchase and sales subforms and list pages: Quote, Order, Credit Memo, Return Orders, and Blanket Orders. This action allows you to add records or edit existing data.
For more information, see the Microsoft Dynamics 365 Business Central documentation.
The workbook is updated to show all record that apply to the updated filter, including non-MEM records. |
| IC Suite Dimensions | This will navigate users to IC Suite Dimensions window where users will select non-entity dimensions from the destination company for the intercompany suite transaction. When users click on this action, they will be redirected to "IC Suite Dimensions- Edit Dimension Set Entries" window. |
| Prepare > Incoming Document |
Attach an incoming document to the purchase transaction, purchase or sales invoice, credit memo, or journal line. Select Create from File or Select.
|
Purchase Invoice
The AP replicator feature is available for purchase invoices. The following field boxes and actions are available for this feature. For more information about this feature, see AP Replicator Workflow.
| Field | Description |
| Replicated |
Displays whether the purchase invoice was created using the AP replicator process. Read-only.
This field box is also available on the Posted Purchase Invoice page. |
| Action | |
| Posting > Post and Replicate |
Creates new invoices using the AP replicator feature. Depending on the setting of the AP Replicator Post Through option on the Multi-Entity Management Setup, the invoice is automatically posted.
Invoices that are created with this process have the Replicated field box set to Yes. This action is also available from the Purchase Invoices list. By using this action from the list page, multiple separate invoices can be posted in a single action. |
AP Replicator Use Line Dimensions
When the AP Replicator Use Line Dimensions option is enabled in MEM Setup, running the Post and Replicate action creates purchase invoices using the Dimension Set ID from the original purchase line or allocation templates. The Dimension Set ID on the purchase invoice header matches that of the purchase line, and the Vendor Invoice No. is formatted as the original Vendor Invoice No. followed by a sequence number (e.g., OriginalInvoiceNo – {Sequence No.}).