In this article
Use this page to create and post sales invoices.
For more information, see Invoice Sales ![]() in the Microsoft Dynamics 365 Business Central documentation.
in the Microsoft Dynamics 365 Business Central documentation.
Billing Schedules
Use this page to view and post invoices that you created from the SBS ARCB Billing Schedule Order/Invoice Creator page. For a line item, you can view the ARCB schedule number and the billing schedule start and end dates.
Any user-defined fields that are specified on the SBS ARCB Billing Schedule Setup page appear in the header and lines section for the invoice.
Create a Billing Schedule
To create a billing schedule for service items or resources from a sales invoice, follow these steps:
- Follow the instructions in the Microsoft Dynamics 365 Business Central documentation to create a transaction.
- Select Manage > New Line.
- To add a service item, set Type to Item, select the item number, and select SBS Options> Item Defaults. in the dialog that appears, do the following:
- Turn on Recurring Item.
- Ensure that Interval and Number of Periods have non-zero values.
- If needed specify the Period to Delay (in Months).
- Edit any of the other settings as needed and select Close.
- To add a resource, set Type to Resource, and select SBS Options> Item Defaults. In the dialog that appears. do the following:
- Turn on Recurring Item.
- Specify the values for Number of Period, Frequency, and Interval.
The Item Type Option option is set to Include 1st Billing Period and cannot be changed. - Edit any of the other settings as needed and select Close.
- Back on the sales order, for the line specify the Billing Start Date and Billing End Date.
- Select Actions > SB Functions > Create Billing Schedule.
- If the billing schedule does not already exist, select the billing schedule group for the new billing schedule. When the SBS ARCB Billing Schedule Card opens, complete and edit the additional fields for the billing schedule as needed.
After you add the items and close the SBS ARCB Billing Schedule Card, the Billing Schedule Number box in the header is updated with the billing schedule number.
- If the billing schedule already exists, the items or resources are added to the existing billing schedule. You can edit the new lines as needed.

If the transaction contains inventory items, the invoices for the inventory items must be created and the items shipped before the billing schedule for the service items can be created.
Sales lines that have been added to a billing schedule are updated to indicate that the invoices have been created and the items are shipped (i.e., Quantity Invoiced and Quantity Shipped are updated and Quantity to Invoice and Quantity to Ship are updated with empty values).
![]() Notes: Review the following notes for service items:
Notes: Review the following notes for service items:
- To be able to create a billing schedule for a sales invoice that has both inventory and service items, the invoices for the inventory items must be created and the items shipped before the billing schedule can be created.
- Changes to the sales line item can be made any time before the first invoice for the corresponding billing schedule line is created.
- If the Recurring Item check box for an item is changed from selected to cleared, the following occurs:
- The sales line is updated to indicate that the invoice has not been created nor has the item been shipped (i.e., Quantity to Invoice and Quantity to Ship are updated and Quantity Invoiced and Quantity Shipped are updated to empty values).
- The corresponding billing schedule line must be manually deleted if the invoice for the line has already been created.
View Billing Schedule Contract Number
To view the billing schedule information for a line, follow these steps:
- For the invoice, select the item you want to know more about in the Lines section.
- Select Line to view other commands.
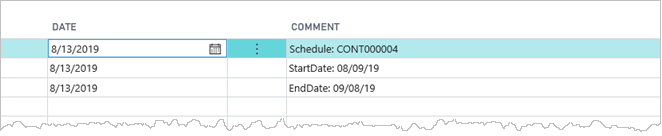
- Select Line > Comments.
- In the Comment Sheet that opens, you can see the billing schedule number and the start and end dates of the billing schedule.
Or in the Lines FastTab, select the SBS Options > Contract Information action.
Defer Revenue Directly to a G/L Account
Before you can all a line item to add a line to defer a revenue amount directly to a General Ledger account, you must have set up the SBS ARED Deferral G/L Account Setup to have at least one line with the Transaction Type for Sales Invoice.
To defer revenue amounts directly to a General Ledger account, follow these steps:
- Use the Microsoft Dynamics 365 Business Central instructions to add a sales invoice.
- When adding a line to the Lines area, set Type to G/L Account.
- In No., select a General Ledger account number. This account number must already be set up for deferrals on the SBS ARED Deferral G/L Account Setup.
- The SBS ARED Transaction (Sales) automatically appears and you can change any of the default values as needed.
- Specify the amount (unit price), and then post the transaction.
The deferral schedule for the General Ledger account is created, and you can review the details on the SBS ARED Deferral Schedules page.
Revenue Split
When adding a line that uses the single multiple element arrangement (MEA) type, the item is automatically set as part of the bundle, and the standalone selling price used is based on the default settings.
![]() Note: When the data comes from an Advanced Recurring Contract Billing billing schedule, this page is read‑only.
Note: When the data comes from an Advanced Recurring Contract Billing billing schedule, this page is read‑only.
When you add an item that is a part of a revenue split, keep the following information in mind:
- When the item you add is a parent in a revenue split template, the sales order list is automatically updated with the child items.
- You can add or remove child items.
- The quantity, unit, site, and warehouse values for child items are based on the parent item.
You cannot change these values for the child items. Any changes must be made for the parent item. - The sum of the net amount of the child items is equal to the Parent amount.
- If the SSP origin of the child item is the percent of parent standard or invoice price, the unit price shows a zero amount. However, the net amount shows the calculated value. If you change the unit price, the net amount is recalculated.
- If the MEA type for the sales order is single, the corresponding MERA transaction line is created when the parent and child lines are added.
- For a revenue split that has the Allocation method set to Variable amount:
- The net amount of the parent item appears in the Parent amount column.
This value can be edited. However, the unit price, net amount, and discount cannot be edited and show a zero (0) amount. - The unit price for child items shows a zero (0) value.
You can edit the unit price or net amount, but cannot edit the discount. - If the invoice for the sales order has not been created, you can add or remove child items.
- The net amount of the parent item appears in the Parent amount column.
- For a revenue split that has the Allocation method set to Percentage:
- The net amount of the parent item appears in the Parent amount column.
This value can be edited. However, the unit price, net amount, and discount cannot be edited and show a zero (0) amount. - The net amount for child items is calculated as follows: Percentage * Parent amount.
- The net amount of the parent item appears in the Parent amount column.
- For a revenue split that has the Allocation method set to Equal amount:
- The net amount of the parent item appears in the Parent amount column.
This value can be edited. However, the unit price, net amount, and discount cannot be edited and show a zero (0) amount. - The net amount of the child items is calculated by dividing the Parent amount equally among all child items.
- When child items are removed or added, the net amount and unit prices are recalculated so that all child lines have equal amounts.
- If the Parent amount cannot be divided perfectly equal, the net amount and unit price of the last child item may be slighter more or less than the other child items.
- The net amount of the parent item appears in the Parent amount column.
Suppressing Child Items
When the sales invoice includes items that use revenue split, you can select whether the child items appear on the invoice. When child items are hidden from the invoice, the parent line shows the summary value of the hidden child items. ![]() See example for details.
See example for details.
Revenue Allocation Posting
When an invoice is posted, the transaction currency amount posted to the revenue account for each MEA line is the calculated revenue amount shown on the SBS MERA Revenue Allocation (Sales Invoice) form. Only the amount in General Ledger is affected, and not the amount on the invoice sent to the customer.
Any line discount shows the net amount with the revenue account and nothing is posted to the line discount account. If the MEA type is single, the total discount for the sales order is allocated to the MEA.
Any other accounts (Consumption, Taxes, etc.) are not affected.
![]() Note: If you create multiple invoices per sales order, the MERA calculation for each invoice is done independently.
Note: If you create multiple invoices per sales order, the MERA calculation for each invoice is done independently.
Example: Revenue Split Template
A Hardware item is sells for 125,000.00 as a package and contains the following components:
| Item | Amount |
| Hardware | |
| Installation | 10,000.00 |
| Labor warranty (1-year) | 5,000.00 |
| Parts warranty (5-year) | 20,000.00 |
The revenue split template is set up as follows:
- Parent item: Hardware
- Line items:
- Hardware
- Installation
- Labor warranty (1-year)
- Parts warranty (5-year)
When the sales order is created, you can add the Hardware item and specify 125,000.00 for the unit price. TheSales Invoice list is updated as follows:
| Item | Amount |
| Hardware | 90,000.00 |
| Installation | 10,000.00 |
| Labor warranty (1-year) | 5,000.00 |
| Parts warranty (5-year) | 20,000.00 |
The Hardware price is automatically calculated as follows: 125,000 - (10,000 + 5,000 + 20,000).
Specify Revenue Allocation
To specify the revenue allocation for a sales order, follow these steps:
- Use the Microsoft Dynamics 365 Business Central instructions to add a sales order.
- Select the Actions tab, and select SB Functions > Revenue allocation, which opens the SBS MERA Revenue Allocation (Sales Invoice) form.
- Select the MEA type, and the MEA number.
- If needed, edit the line items.
- Select OK.
Add or Remove Item for a Revenue Split
To add or remove a item for revenue splitting, follow these steps:
- Use the Microsoft Dynamics 365 Business Central instructions to add a sales order .
- In the Lines, add a parent item, complete all necessary cells for the line (e.g., Quantity), and select the Revenue Split check box.
When you select on to the next line, the list is updated with the child items from the revenue split template.
The item number for child items are slightly indented directly below the parent item. - To add a child item:
- Select the parent item, and select SBS Options > Add Revenue Split Child.
- Select the item you want to add and select OK.
- To remove a child item:
- Select and right-click a line and select Delete Line.
- When you are asked to confirm the action, select Yes.
When you post the invoice on this page, you can choose to suppress (or hide) the child items from the invoice using any of the following options:
- On the Home tab, select Posting > Post and Send... or Test Report...
- On the Actions tab, select Posting > Print Draft Invoice ...
- On the Actions tab, select Pro Forma Invoice...
When you print the invoice, the Options area on the print dialog has the ![]() Suppress Child Items on Print check box.
Suppress Child Items on Print check box.
Fields
The following field boxes are available:
| Field | Description | ||||||
| Header | |||||||
| User Defined Fields |
Only the user-defined fields that are specified on the SBS ARCB Billing Schedule Setup page appear. If you do not see the user-defined fields, select Show More in the heading of the FastTab. The user-defined fields for billing schedules are independent and unrelated to the user-defined fields for deferral schedules. |
||||||
| Suppress Child Items |
Indicates whether child items of a revenue split appear on a sales invoice:
If the net amount of the (hidden) child items has a non-zero sum, the net amount of the parent line shows a summary of the child lines. For more information, see Sales Invoice. This option can be used only when all (parent and child) items in a revenue split are included on the invoice. The default setting is from the SBS MERA Multi-Element Revenue Allocation Setup. |
||||||
| Billing Schedule No. | Displays the corresponding billing schedule number. Select the link to view the details on the SBS ARCB Billing Schedule Card. | ||||||
| Lines | |||||||
| Revenue split |
Indicates that a line uses revenue splitting:
|
||||||
| Parent amount |
Displays the new amount of the parent item. |
||||||
| Defer COGS on Parent/Child |
Select the deferrable item in a bill of materials (BOM) setup: Parent or Child. This option is available for the parent item in a BOM. A BOM is set up with item 1002 as the parent with the following children:
On the SBS ARED Deferral Item Setup , the setup is as follows:
A sales order for item 1002 with the following is created:
The following table shows the difference between deferring the parent or child:
The default is from the Sales Invoice, which you can change as needed. |
||||||
| Recurring Item |
Select this check box for service items that you want to include in the billing schedule that is created from the sales invoice. This option can be updated from the SBS ARCB Item Defaults dialog. For items that use revenue splitting, this check box is available only for the parent item. |
||||||
| Billing Start Date |
Specify the billing start date for the service-only line item. This date is used for the billing start date on the corresponding billing schedule this is created. |
||||||
| Billing End Date |
Specify the end date for the billing schedule. When this value is empty, it is automatically updated based on the number of periods specified on the SBS ARCB Item Defaults. |
||||||
| Deferral Item | Select this check box for items that are deferral items and will have a corresponding deferral schedule. | ||||||
| User Defined Fields |
Only the user-defined fields that are specified on the SBS ARCB Billing Schedule Setup page appear. The user-defined fields for billing schedules are independent and unrelated to the user-defined fields for deferral schedules. |
||||||
| Purchase Document No. | Displays the number of the purchase document created from the sales document. | ||||||
| Invoice Details | |||||||
| Payment Terms Code | Displays the payment terms for the invoice. This value is from the Payment Terms of the billing schedule line on the SBS ARCB Billing Schedule Card page. | ||||||


Actions
The following actions are available:
| Action | Description |
| Header Actions - SB Functions | |
|
Select an action to perform on the billing schedule: |
|
| Support and Renewal | Opens the SBS ARCB Billing Invoice Support and Renewal page, where you can review and edit support and renewal information for an item. |
| Revenue Allocation |
Opens the SBS MERA Revenue Allocation (Sales Invoice) page, where you can change the revenue allocation options for the transaction. |
| Create Billing Schedule |
Opens a window where you select a billing schedule group. After you select a group, you can create a billing schedule from a sales document for the selected service item line. To be able to use this feature, the Recurring Item check box for the line must be selected. When the sales document is created, the header and item line information from the sales document is copied to the billing schedule.
|
| Append to Existing Schedule |
Opens a dialog where you select an existing billing schedule. When the sales document is created, the header and item line information from the sales document is copied to the billing schedule, and the item or resource is added to the billing schedule lines. |
| Lines Actions - SBS Options | |
|
Select an action to perform on the billing schedule: |
|
| Item Defaults |
Opens the SBS ARCB Item Defaults, where you specify the default values when the service item is added to the billing schedule. |
| Advanced Deferral |
Opens the SBS ARED Transaction (Sales) page, where you specify the information for a deferral schedule that is created for the selected line. For billing of materials (BOM) items, a list of items (both nondeferral and deferral) appears. Select the item you want to view and select Deferral Defaults to view the deferral information for the item. Not available for lines that are Resource type. |
| Add Revenue Split Child |
Opens a dialog where you can select a child item to add to the sales document. Available only for parent items of a revenue split. |
| SBS Contract Information |
Opens a dialog list where you can review the billing schedule contract information for the selected line item. This action is useful when the Consolidated by Item Excluding Start and End Dates option has been used for an invoice. |
| Calculate Unit Price |
Select one of the following actions:
These actions are available for Standard type line items with a Flat pricing method. Check the SBS ARCB Item Defaults dialog. |
Validation
A validation function has been added to Build 41.0. Consider the following scenario. A sales invoice with a regular customer is created, with a single item. If a customer wants to create a billing schedule from this sales invoice. Before the billing schedule can be created, it must be made recurring. This is done via the SBS Options > Item Default screen.

Enable the Recurring Item button.
Under Item Type Options, select Include 1st Billing Period. This validation procedure applies only to this menu option.
Press the Close button to exit this screen.
If the customer tries to post the invoice, the system will not allow it. The following error message will be displayed "ARCB billing schedule must be created before posting the line XXXXX"

Customers will not be allowed to post an invoice unless a billing schedule has been created first, because the invoice status was set to Recurring.